You had me at kale

In a few days this (b)log will be celebrating its fifth birthday. It’s fun to go back and read the beginning of what has become, for me, a source of joy in my life. I get to be creative and think about food and words and pictures, and it helps to keep some of the other noise out of my head. I think what I’m trying to say is- I really love writing.

IMG_4462

This is also the second edition of Wisconsin Whisk‘s “All Whisked Up!” For this round I got to make to make something from Vicky Cassidy’s blog, Things I Made Today. Vicky’s blog is beautiful- I am mesmerized by the ever-changing drawn pictures of fruits and vegetables that grace each page- and full of delicious sounding recipes (she also loves blue cheese as much as I do, so I know we’ll be friends.)

IMG_4467

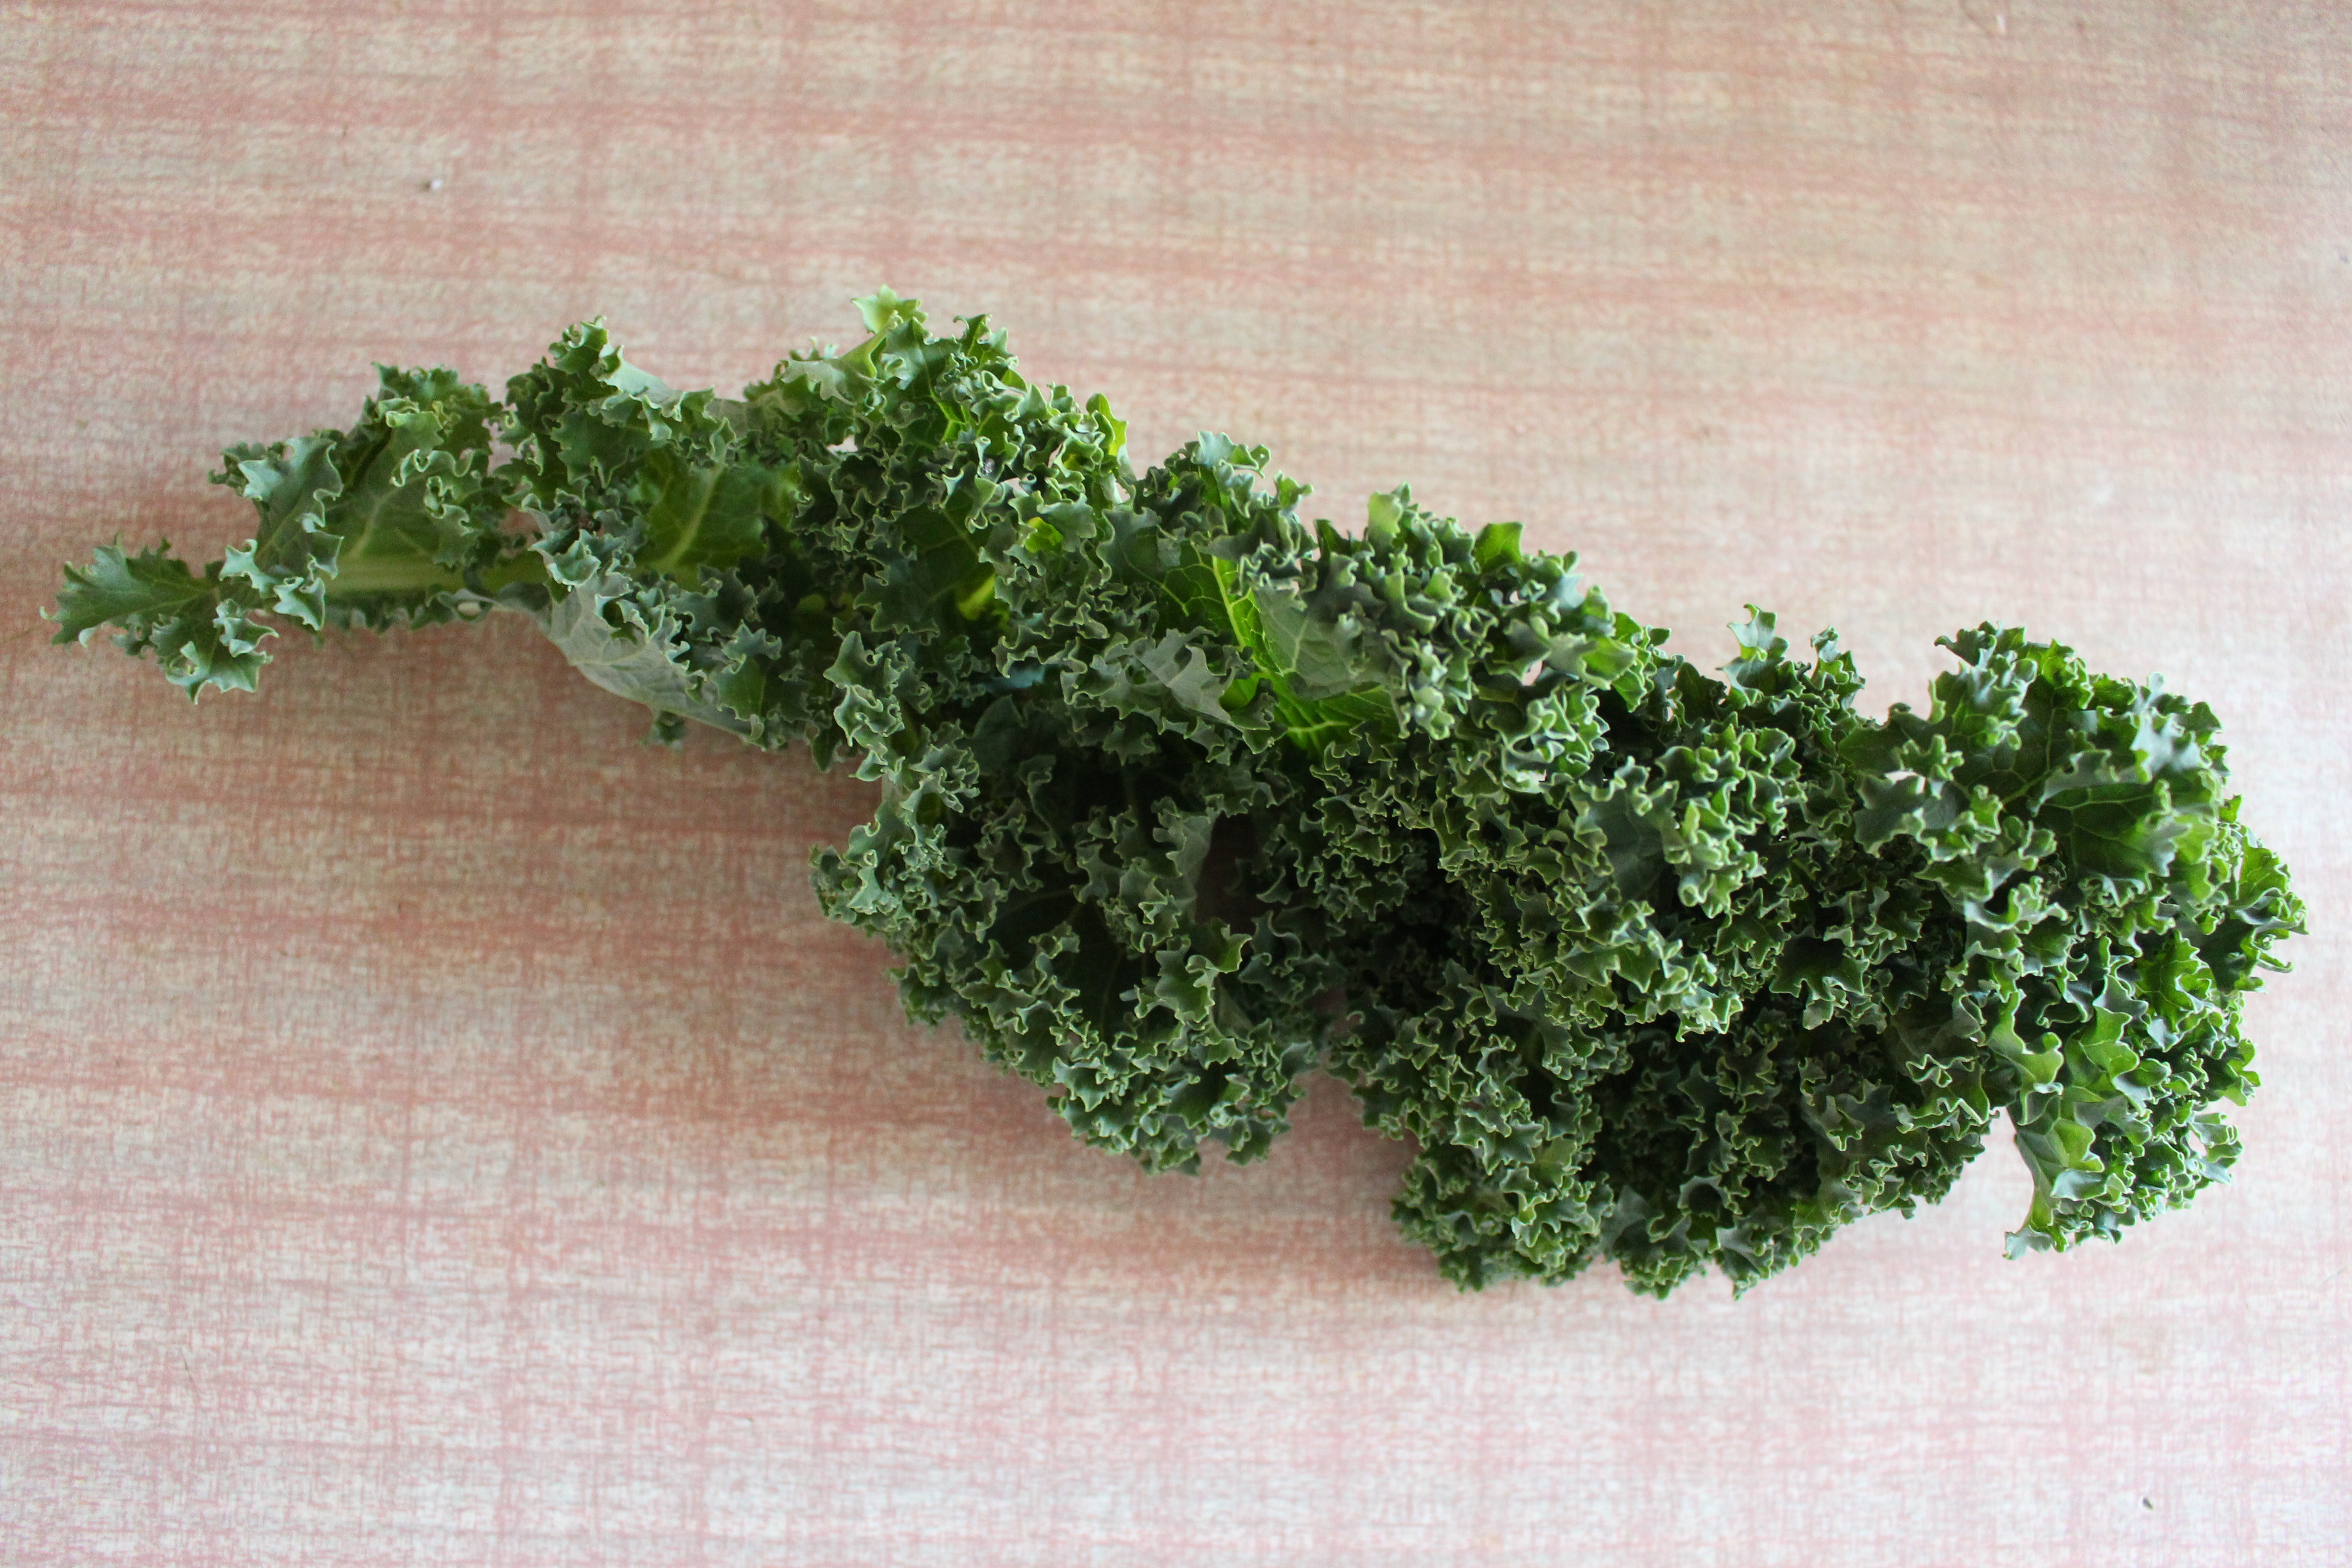
This unseasonably warm November weather has been incredible, but it is confusing my taste buds. The early darkness of the day calls out for soup, but the warmth is crying for something lighter. In the end I decided on Vicky’s kale salad with maple citrus dressing because it all goes back to kale (and I already had a bag of it in the fridge from my friend’s garden.) I also felt bad for badmouthing squash the other day, so I decided to give it another chance. This salad is incredibly tasty. I accidentally devoured the leftovers before I remembered that I was supposed to photograph it, which is testament to the salad, I suppose. I substituted raisins for the dried cranberries (the co-op was out of dried cranberries and I could not bring myself to pay $4.16 for a bag of 11 organic dried cherries) and I used an unidentified winter squash, but I am posting the recipe as it appeared on Vicky’s site, as it was meant to be. We ate bowls full of the salad for dinner along with a Madison Sourdough Co. baguette. It was pitch black outside, but the windows were wide open to the warm November wind.

_____________________________________________________________

Kale, Squash, Quinoa Salad with Maple Citrus Dressing

From Things I Made Today

INGREDIENTS
For the squash:
2 medium sized patty pan squash, cut into small wedges
2 tablespoons olive oil
½ teaspoon sweet paprika
½ teaspoon chili powder
½ teaspoon Kosher salt

For the dressing:
zest and juice of 1 lime
3 tablespoons olive oil
1½ teaspoons maple syrup
½ teaspoon ground cumin
½ teaspoon chili powder
2 garlic cloves, minced
Kosher salt to taste

For the salad:
½ cup red quinoa, dry
1 large bunch kale, stemmed and coarsely chopped (about 6 cups)
½ cup dried cranberries
½ cup feta cheese, crumbled

INSTRUCTIONS
Roast squash:
Preheat oven to 400.
In a large bowl, combine squash, olive oil, paprika, chili powder, and salt. Mix well so squash is covered. Bake for 20-25 minutes, turning half way, until squash is tender and slightly browned.
Let cool to room temperature.
Make the dressing:
In a small bowl, whisk together all ingredients for dressing. Set aside.
Make the rest:
Combine dressing with kale in a large bowl. Let sit while remaining ingredients come together.
Cook quinoa according to package instructions. Transfer to a plate and let cool to room temperature.
Combine dressed kale, quinoa, roasted squash, feta cheese, and dried cranberries and mix well.

__________________________________________________________________________

Enjoy.

To see other All Whisked Up recipes, click on the smiling frog:

Happy today

The truth of the matter is, I’ve been feeling a lot like my sister, the one on the right in this photo, the last few weeks.

There is one glaring reason for my sadness- my beloved tabby cat passed away a few weeks ago and left a void that has yet to be filled. And another obvious one- I haven’t slept through the night in over a year. But there is another underlying issue at the heart of it: While everyone else is parading around pumpkin patches and cooking up squash, I just don’t get all that excited about fall. Yes, the leaves are beautiful and I get to wear my favorite Lebowski-esque cardigan sweater again, but I miss summer. I miss the crickets and I miss the long, warm days. I miss Bob Uecker on the radio and I miss swimming in lakes. I miss my tomatoes that never ripened and I hate spaghetti squash. There. I said it.

Now, I realize that it doesn’t behoove you to write off an entire season, especially when you live in a climate like ours; it’s a considerable chunk of your life here in the upper midwest. In an effort to embrace the season, I’m channeling my two-year-old self: The one, who upon discovering that on Halloween all you have to do is knock on a door and someone will hand you candy, danced up and down her street yelling “Happy today, happy today, happy today!”

So I’m going to carve a pumpkin and whip up some molasses bars. I’ll cheer on the Pack and dig out my ski socks. I’ll daydream; maybe this will be the winter I’ll practice the banjo and learn to crochet. And I’m making stew because when it comes to soup, summer ain’t got nothing on fall. When I first made this stew I used Rancho Gordo heirloom yellow eye beans, which I had bought back when I was employed.

IMG_2782 IMG_2787

Since then I have also used good old white pea beans (navy beans.) You can read all about how to cook dried beans here. I start by rinsing the beans and then soaking them (or not) for a few hours (if they haven’t soaked, the cooking time will be longer.) You then cover them with water in a big soup pot, adding olive oil and celery/ onions/ carrots, if you like. Cook the beans at a slow simmer until they are done. I adapted this recipe for bean stew from an article I read in The New York Times all about the Greek island of Ikaria, in the Aegean Sea, where people stay up late, take naps after lunch, and drink lots of wine. Sounds good to me.

___________________________________________________________

Yellow Eye Bean Stew

Adapted slightly from The New York Times

1 pound of yellow eye peas or navy beans
1 medium onion chopped
1 can diced tomatoes
1 bunch of kale, stems removed and finely chopped
A handful of chopped parsley
1 chopped carrot
Chopped dill or fennel
olive oil
salt, season to taste

Cook beans until they are almost done (see directions above.) Add the vegetables and herbs. When the beans are done, add salt to taste. Turn off the heat and add 2 tablespoons olive oil.

_________________________________________________________

Serve the bean stew with crusty bread and lots of red wine and toast to the “blooming and singing of the dark” (this comes from another New York Times article which quotes the Japanese writer Junichiro Tanizaki who said, “Were it not for shadows, there would be no beauty.”) Have a fire in your backyard. Eat halloween candy. And while it’s okay to be sad, you can also try telling yourself happy today, happy today, happy today.

All whisked up!

My friend Martha says that sometimes if you want something, you just need to put it out there to the universe and see what happens. This is how I felt one morning in August when I opened my computer to find an email request to do some freelance writing and an invitation from this woman to join a new collective of Wisconsin food bloggers called Wisconsin Whisk. With taking the year off of teaching, I knew I wanted to do more writing, but I needed some sort of a cosmic kick in the buns. And that morning I got it. Since then I have written several articles (including this one and this one), been mentioned in a Capital Times article highlighting Wisconsin Whisk, and was a guest judge at a vegan chili cook-off fundraiser for the Alliance for Animals.

And now I want to introduce you to Tara at Yummy Sprout and her farmer’s market biscuits. For a fun Wisconsin Whisk event (All Whisked Up!), we were assigned another blog to read and find a recipe to recreate. I knew as soon as I saw Tara’s biscuits that I was going to try those. If you read my blog regularly (thanks, immediate family), you know I’m not much of a baker, but these were super easy to make and taste delicious.

IMG_3921

I substituted jalapeno peppers from my garden, but otherwise made them just the same.

___________________________________________________________________

Cheddar and Jalapeno Biscuits

From the website Yummy Sprout

Ingredients:
1 1/2 cup flour (plus extra for dusting)
1/2 teaspoons organic sugar
1 teaspoon baking powder
1/4 teaspoon baking soda
1/2 teaspoon salt
3 1/2 tablespoons cold butter, cut into small chunks
1/2 cup plus 1 tablespoon milk
1 1/2 tsp apple cider vinegar
1 jalapeno pepper, chopped
1 cup cheddar (shredded)
Directions:
Preheat the oven to 425°F. Sift flour, sugar, baking powder, baking soda and salt into a medium bowl. If using a sifter you may need to push organic sugar through as it is a bit courser.  Next add the butter and use your fingers (if you have a pastry cutter you can use that too) to work butter into the flour until you have a course meal, with pieces no larger then pea size.  Add the vinegar to the milk and allow it to sit for a couple minutes, to make buttermilk.  Stir in most of the buttermilk (reserving about 1 tbsp), cheese and peppers, just until mixed.

Knead dough briefly on a lightly floured surface, just until it holds together. Coat a rolling pin with flour and roll out the dough to about 1/3 inch thick. Cut little biscuits out with any cookie cutters you like. Place biscuits on un-greased baking sheets. Brush the tops of biscuits with remaining buttermilk and bake until biscuits are golden, 10 minutes.   .
_________________________________________________________________
 Happy Friday.

So lucky

Hello from this side of October. With everyone else asleep on the couch, I’m reminiscing about yellow rafters discovered at a coffee shop last week on our vacation to Door County.

IMG_3465

Dan and I decided to take Half-moon on a little September adventure. Thanks to the generosity of friends and their families, we stayed at a cabin on Kangaroo Lake near Bailey’s Harbor and in a beautiful apartment on Washington Island. We drank coffee from an adorable cabin with a strange name and beer from the hippest new brewery on the mainland.

IMG_3476 IMG_3471 IMG_3467 IMG_3769  IMG_3775 IMG_3766

We had crazy delicious sandwiches and gelato from Door County Creamery in Sister Bay.

IMG_3420 IMG_3422 IMG_3430

We got a behind-the-scenes tour of the gardens of Wickman House, thanks to my old friend- and gardener- Adam, and ate there that night for our first dinner in a restaurant since Half-moon joined the picture. Never have I eaten more delicious pasta dish in a restaurant- ravioli with preserved lemon and capers. The whiskey drink I nursed throughout the night wasn’t too shabby either.

IMG_3501

And then we boarded the ferry to Washington Island. What is it about ferries? I wish I had a reason to take one every day. On The Island we ate lots of pizza, drank lots of beer, dared each other to dunk into Lake Michigan at Schoolhouse Beach and had fires at sunset at one of the most beautiful spots in the world.  Half-moon flipped himself over onto  his stomach-surprising himself and us- and laughed up there for the very first time.

IMG_3525 IMG_3583 IMG_3611 IMG_3637

What luck.

You keep me hanging on

Happy September.

yum

Summer keeps us hanging on. And with my sister visiting from Seattle the last week of August and beginning of September, we soaked it in. We swam, we kayaked, we cheered on Tom Cruise in Top Gun at the Union Terrace with a bunch of people who weren’t born when that movie was in theaters. And we broke down and bought tickets to Yum Yum Fest 2015.

IMG_3033

There wasn’t much (any) vegetarian food (we’re still not over pork belly?), but thank goodness for cold brew coffee push pops from Forequarter and Barmadillo’s delightful cocktails named after old baseball players. What more do you need, really?

IMG_3048 IMG_3043

With this heat, all I’ve wanted to do is eat ice cream and drink booze, but with Half-moon in the picture, I’m trying to be a good vegetarian and eat protein, protein, protein! I’m lousy at grains and feel guilty just from looking at back issues of Bon Appetit that praise the wonders of Farro! Freekeh! Millet! Teff! It makes my head spin. But the other day as I stared remorsefully at the jar of spelt berries on my counter that hadn’t been touched since who-knows-when, I took action. I soaked those suckers in a bowl of water overnight (which was not my intention, but I went to bed before cooking said spelt berries) and the next day I cooked them up and made a tabbouleh-inspired salad with cherry tomatoes, lemon juice and loads of parsley. It hit the spot.

IMG_3267

______________________________________________________________________

Spelt Berry Cherry Tomato Salad

Ingredients:

1 1/2 cups uncooked spelt berries
1/4 onion, chopped
cherry tomatoes, halved
bunch of parsley, chopped
juice of 1 lemon
olive oil
salt and pepper to taste

Directions:

Cook the spelt berries (you may soak for an hour- or overnight- to lessen the cooking time.)* Once the grains are cold, mix them together with cherry tomatoes, onion and parsley. Make a citrus-y dressing with the juice of a lemon, olive oil and salt and pepper (bonus points for freshly smashed peppercorns.) Leftovers are good for a couple of days.

*How do you cook spelt berries? (From the kitchn.com)
• If you want the spelt berries very soft, like steamed rice, add 3 cups of water or stock to 1 cup of spelt, cover and simmer for 1 1/2 hours.
• If you like it chewier and nuttier, like for salads, use 2 cups of water or stock for every cup of spelt berries. Cook the spelt like risotto, adding half a cup at a time and stirring after each addition until the liquid evaporates. They should be tender after about 30-40 minutes.

_______________________________________________________________________

Enjoy the heat while it lasts, my friends. The crickets’ songs will soon be a memory.

When life gives you carrots

Happy August.

IMG_2182

You know that time-old adage “when someone accidentally brings home a five-pound bag of carrots from the grocery store instead of a one-pound bag, make pickles”? Well, good news: Summer is pickle season! And pickled carrots are just the thing to make on a hot Friday late afternoon. The recipe comes from Ms. Molly and I wish I had the charming Beatrix Potter-esque carrots that she used but I just made carrot sticks. The good old kind that my mom would put on the dinner table every night in a small yellow cup filled with water to keep them crisp.

There is something about making a pickling brine that satisfies this part of my being I didn’t know existed until recently. It’s something basic and primal- maybe my Iowa roots- but you can’t beat the hazy glow of vinegar that hangs in the air while you crack peppercorns and wash quart-sized jars.

IMG_1688

Half-moon watched later that night from his perch on the kitchen floor as we listened to the Brewers on the radio and I packed the carrots into jars and stuck them in the refrigerator. In a week we could crunch into the garlicky, tangy pickles.

____________________________________________________________________

Spicy Pickled Carrots with Garlic and Thyme

This recipe comes from Molly Wizenberg’s first book, A Homemade Life.

Ingredients:

2 cups apple cider vinegar, plus more for topping jars
2 cups water, plus more for topping jars
1/4 cup granulated sugar
6 (5- to 6-inch) sprigs fresh thyme
5 large cloves garlic, thinly sliced
1 1/2 teaspoons black peppercorns, cracked
1 1/2 teaspoons red pepper flakes
Heaping 1 1/2 teaspoons salt
Heaping 2 teaspoons brown mustard seeds
1 1/2 pounds small (finger-sized) carrots, or standard carrots, cut into sticks about 1/2 inch wide and 3 inches long

Directions:

In a medium saucepan, combine 1 1/2 cups apple cider vinegar, water, sugar, thyme, garlic, black peppercorns, red pepper flakes, salt, and mustard seeds. Bring to a boil over medium-high heat, then reduce to a simmer and cook, stirring occasionally, for 10 minutes. Remove the pan from the heat, and let cool for 5 minutes. Stir in the remaining 1/2 cup vinegar.

Put the carrots in a large, heatproof bowl, and pour the warm brine over them. Cool to room temperature. While the carrots cool, wash 2 quart-sized canning jars and their lids in warm, soapy water.

When the carrots and brine are cool, distribute the carrots evenly among the jars, arranging them snugly. (Hands and finger work best for this; tongs make a mess.) Using a ladle, divide the brine evenly among the jars. The carrots should be covered completely by brine. If they are not, add a mixture of 2 parts vinegar and 1 part water to cover.

Seal firmly and refrigerate for at least 3 days, or, preferably, a week; carrots are dense and take time to absorb the brine.

Note: Covered and refrigerated, pickled carrots will, in theory, last indefinitely, but we try to eat them within a month or two.

Yield: 2 quarts

____________________________________________________________________

Happy pickling!

Blossom and bloom

After a cool start, summer has arrived in Wisconsin. Things here continue to move at a pretty slow pace.

1

Hanging out in the mornings with Half-moon while he pulls up a stool at the milk bar, I have been observing summer perennials and a neighborhood romance bloom (watching white-haired, tank-topped Gordy pedal back and forth by our other neighbor’s house on his turquoise bicycle, I started to get suspicious… One day I got to text Dan, “they smooched!”) While the days feel pretty lazy, I also like to play a game called, “What can I get done in the two minutes it takes Dan to change Half-moon’s diaper?” Then I go into turbo-charge: I turned a calendar page (eleven days late)! I made diaper spray (1 cup water + 1 tablespoon olive oil + 1 teaspoon soap, like Dr. Bronner’s)! I found the key to the garage in the washing machine! It’s a lot of fun.

We’ve also been experiencing some “firsts.” On Wednesday, Half-moon attended his first gig with his dad. It was at Cress Spring Bakery for their pizza night. Located in a valley outside of Blue Mounds, Cress Spring Bakery is an idyllic place to lounge with a wood-fired pizza and a cold can of beer. Their chocolate chip cookie/ Sassy Cow vanilla ice cream sandwich might be my favorite thing I have eaten this summer.

IMG_1835

This morning we took Half-moon to his first downtown farmer’s market. Yesterday, he met his first donkey at his first music festival, and a couple of weeks ago I actually followed a recipe to make marinade for the first time. And it was really f*$#ing good. The recipe came from my new Thug Kitchen cookbook, and if you don’t know Thug Kitchen, you need to.

IMG_1595

(Disclaimer: I didn’t actually make the marinade for the baked tofu- Dan did- but I called out the ingredients from the milk bar.) I’m pretty sure I’ve mentioned this before, but my favorite way to eat tofu is baked. Not me, the tofu. While the Thug Kitchen cookbook didn’t say this, I like to bake tofu on parchment paper- I think I learned this from Mark Bittman– when you only have two minutes to clean up, this makes it really easy (first press the tofu before marinating, then bake tofu for 10-15 minutes on a cookie sheet lined with parchment paper in a hot oven-  400 or 450 degrees.) We followed the recipe for the ginger-sesame marinade and ate it with the Vietnamese Rice Noodle Salad. Here is the recipe for the marinade for the tofu:

IMG_1591

And the noodle salad:

________________________________________________________________________________________

Vietnamese Rice Noodle Salad

From the Thug Kitchen cookbook 

Ingredients: 

1 package (6.75 ounces) thin rice noodles
1/2 head of lettuce, chopped (or other greens)
2 medium carrots, cut into matchsticks
1 cucumber, peeled and cut into matchsticks
1 cup thinly sliced fresh mint leaves
1 cup thinly sliced fresh basil leaves
1 cup chopped cilantro leaves
1 cup sliced green onions
1/2 cup roasted peanuts, finely chopped
Lime wedges, for serving
Toasted sesame dressing* (or other Asian dressing)

Directions:

Cook the noodles according to package directions. When they are done, drain the noodles and run them under cold water until they are cool to the touch. Set aside.While all that is going down, get all your veggies and herbs ready and make your dressing.To serve, pile a large mound of noodles in the center of each plate. Arrange the lettuce, veggies, and herbs around the mound while leaving a good amount of the noodles exposed. Drizzle the dressing on both the noodles and lightly around the vegetables. Sprinkle peanuts all over and serve with lime wedges.

_________________________________________________________________________________________

*

IMG_1597

We are now off to our first neighborhood block party. Happy Saturday, my friends.

Over the moon

Towards the beginning of June, I gave birth to a son. We’ll call him “Half-moon.” That is what I not-so-secretly wanted to name him. It came to me in the middle of a sleepless night- in addition to becoming my favorite yoga pose during pregnancy, I thought it would set him up for a career as a left-handed pitcher.

Meet Half-moon:

IMG_0604

Parenthood is a trip; my kid’s faces and noises are pretty much the most damn charming thing on earth. The cats couldn’t be more excited.

IMG_1198

I’ve gotten pretty good at doing things one-handed. Motherhood has also drastically altered my definition of a “productive” day. Now I get excited if I make a smoothie! Before noon! But today I really have something to brag about- as I type over the head of Half-moon, there is a raspberry crisp bubbling away in the oven. I was inspired by a recipe for a peach crisp in the July issue of Bon Appetit and the fact that there was a bowl of raspberries- picked over the weekend by Dan- sitting on the counter. I also added strawberries and cherries for good measure.

IMG_0071

I love crisps because there is a decent chance you have all of the ingredients if you decide to make one on a whim, and they are so impossibly easy- you could probably even do it one-handed.

_______________________________________

Iron-Skillet Raspberry Crisp

Adapted from Bon Appetit, July 2015

Topping
1 cup all-purpose flour
⅔ cup (packed) light brown sugar
½ teaspoon kosher salt
½ cup (1 stick) chilled unsalted butter, cut into pieces

Filling
1½ cups walnuts
2 tablespoons unsalted butter, room temperature
2¼ pounds fruit (I used raspberries, cherries and strawberries)
½ cup (packed) light brown sugar
¼ cup granulated sugar
3 tablespoons fresh lemon juice
½ teaspoon kosher salt

Directions:
Whisk flour, brown sugar, and salt in a medium bowl. Rub in butter with your fingers until clumps form and no dry spots remain.
Preheat oven to 350°. Toast walnuts on a rimmed baking sheet, tossing once, until slightly darkened in color, 8–10 minutes. Let cool, then coarsely chop.
Smear bottom and sides of a 10″ cast-iron skillet with butter. Toss walnuts, berries, brown sugar, granulated sugar, lemon juice, and salt in a large bowl to combine. Transfer to skillet and crumble topping, breaking up into large pieces, over filling.
Bake crisp until topping is golden brown and juices are thick and bubbling around the edges, 25–35 minutes.

_______________________________________

Eat with vanilla ice cream. Because it’s summer. And you deserve it.

IMG_0058

Welcome to the world, Half-moon. May it be always be filled with fresh-picked raspberries and kitties. Cheers.

Homemade

Happy Valentine’s Day from very sunny, very cold Wisconsin. This morning I’m eating onion bagels smothered in cream cheese, nursing a lukewarm cup of coffee and re-reading sections of (my newly autographed!A Homemade Life, looking for the pink cookie recipe that broke my hand mixer four years ago. Four years ago. It was just a couple of days before the protests started. And I’m pondering trying that recipe again and if I do, I’ll tell you about it, because I never did. But today I wanted to tell you about homemade hot chocolate.*

IMG_3137

Last weekend Dan and I ventured up to Bayfield in search of snow and to check out the Apostle Island Sled Dog races. We stopped in Chetek on our way where my cousin had arrived earlier that day to start a fire and heat the cabin. The next morning Nancy spoiled us- with a capital s- with a breakfast of coffee, yogurt, just-whipped cream, berries and powdered sugar, fried purple sweet potatoes, eggs, toasty warm french bread and butter from the Hope Creamery in Hope, Minnesota (I mean, geez…)

IMG_3225 IMG_3226

Then Nancy upped the ante by making me a mug of homemade hot chocolate for the road, which I sipped on all the way to Ashland. Homemade hot chocolate is such a treat, and one I never think to make for myself (until now.) It reminds me most of all of early mornings in my best friend’s kitchen after she had gotten her driver’s license. Newly liberated, Meagan would wake early on Saturdays to make us a thermos of hot chocolate to throw in her parents’ station wagon next to our neon K2 skis before we would head out Highway 151 to Tyrol Basin for the day. I remember sitting sleepily at her kitchen table, watching her heat the pot of milk on the stove.

If you want to spoil yourself- or someone else you love today- here is the recipe that Nancy shared with me:

_______________________________________________________________

Nancy’s homemade hot chocolate

8-10 oz whole milk, hot (microwave or saucepan)
2 – 3 tsp organic dark brown sugar (recommended brand Wholesome Sweeteners)
1 Tbsp -4 tsps Ghirardelli unsweetened baking cocoa (not their hot chocolate mix)
Heat milk. Add brown sugar and cocoa powder for each cup. Stir well.

________________________________________________________________

Enjoy!

P.S. I also highly recommend a mug from Toast Ceramics, made here in Madison. Dan got me the one on the right in the top photo for Christmas and then I got the one on the left to send to my sister in Seattle. They are the perfect shape for holding cupped in both hands on cold winter days.

*It turns out I was channeling Molly Wizenberg in more way than one today- she was also writing about hot chocolate on orangette today.

A labor of love

A baker I am not. But every year, around Christmas time, I inevitably forget this fact and get the urge to create sweet things in the oven. This is actually the third year I have made this recipe and I usually curse it at some point or another every time, even though it is ridiculously easy. And the fun thing about this recipe is that afforded me not one, but two opportunites to bang things really hard with my rolling pin (I believe the first time was a fluke- I don’t anticipate you having to do the same thing.) It took me four days to actually make the cookies, from start to finish. I started the dough on Sunday right before entertaining some guests, which led me to abandon the dough for a day and a half in the fridge. Yesterday I rolled out the dough and used a small jar to form the cookies into circles. Before I could roll out the dough, however, I had to pound it into submission after having let it “chill” (harden into a rock) in the refrigerator for two days.

IMG_2955

Next I baked the cookies, let them cool, and then put them back into the stove so my butter-loving cats wouldn’t attack them when we left for a Christmas party last night. This afternoon, after Christmas Eve yoga and a brunch of baked eggs, I melted white chocolate in the oven, subsequently burned it, added milk to it, and then busted out the rolling pin again to crush the organic candy canes in my new dish towel.

IMG_2965

Somehow, these cookies survived. And I think that’s why I keep returning to this recipe. My version looks nothing like the original, but I love them just the same.

IMG_2974

In the spirit of that wise old saying- do as I say, not as I do- I am going to print the recipe the way that it appeared on Vegetarian Ventures. My adaptations- with the exception maybe of using all purpose whole wheat flour- are not recommended.

___________________________________________________________________

Peppermint Brown Butter Shortbread Cookies

From Vegetarian Ventures

  • 2 sticks of butter (1 cup), divided & at room temperature
  • 1/3 cup brown sugar
  • 1 1/2 cups all purpose flour
  • 1/2 teaspoon salt
  • 1 box of peppermint candy canes, unwrapped and crushed
  • 8 ounces of white chocolate

Start by browning half (one stick) of the butter. Place butter in a small saucepan over low heat and let cook until small brown flakes form. Stir often so the bubbles don’t bubble over the pan or so that it doesn’t burn. Once the butter has browned, immediately pour it into a glass cup and let cool completely.

Beat together the butter (browned and regular) and the brown sugar. Next, add in the flour and salt and continue to beat until a thick ball of dough forms. Wrap dough (with parchment, wax paper, etc) and let chill for at least 30 minutes (this will help keep the dough together).

Once chilled, transfer dough to a floured surface and roll out to about 1/2 inch thick. Use a biscuit cutter or the top of a round glass to cut out circular shapes. Transfer to a greased cookie sheet and repeat with the rest of the dough.

Preheat oven to 350 degrees and place the cookies in the fridge to chill for 10 minutes while the oven preheats (this will help the cookies keep their shape). Cook cookies for 15 minutes or until they are golden brown around edged. Let cool completely.

Crush the peppermint candy canes anyway you see fit. I put mine in a ziploc bag and went to town using a meat tenderizer (also known as the kitchen hammer!) until they were in tiny pieces.

Melt the white chocolate in either your microwave or over a double boiler. I don’t have a microwave so I used the double boiler method which consisted using one saucepan inside the other and letting water simmer under the first pot while I constantly stirred the white chocolate over it until melted (this was a terrible explanation. If it is your first time using a double boiler, use this as a reference). Once melted, dip half the cookie into the chocolate and then roll in the peppermint chunks. Place on wax paper (this prevents sticking) and repeat with the rest of the cookies. Let cookies chill in fridge for 15 minutes or until the chocolate has hardened.

_________________________________________________________________________

Merry Christmas, y’all.